 As with many young products, there are a bunch of detail-level questions where we have to honestly say we just don’t know…yet. One of those is what kind of adhesive is best for the flatBack clips: a dizzying array of choices for a confusing set of applications stands before us at this time.
I’ve had really good luck with the foam VHB™ tapes (Very High Bond-Strength™, again from 3M). The thin gray stuff seems to work a lot better on these surfaces than the clear, gel-style adhesives. That was the only kind that held well to unfinished, raw plywood. Now I have to figure out how to get it to you.
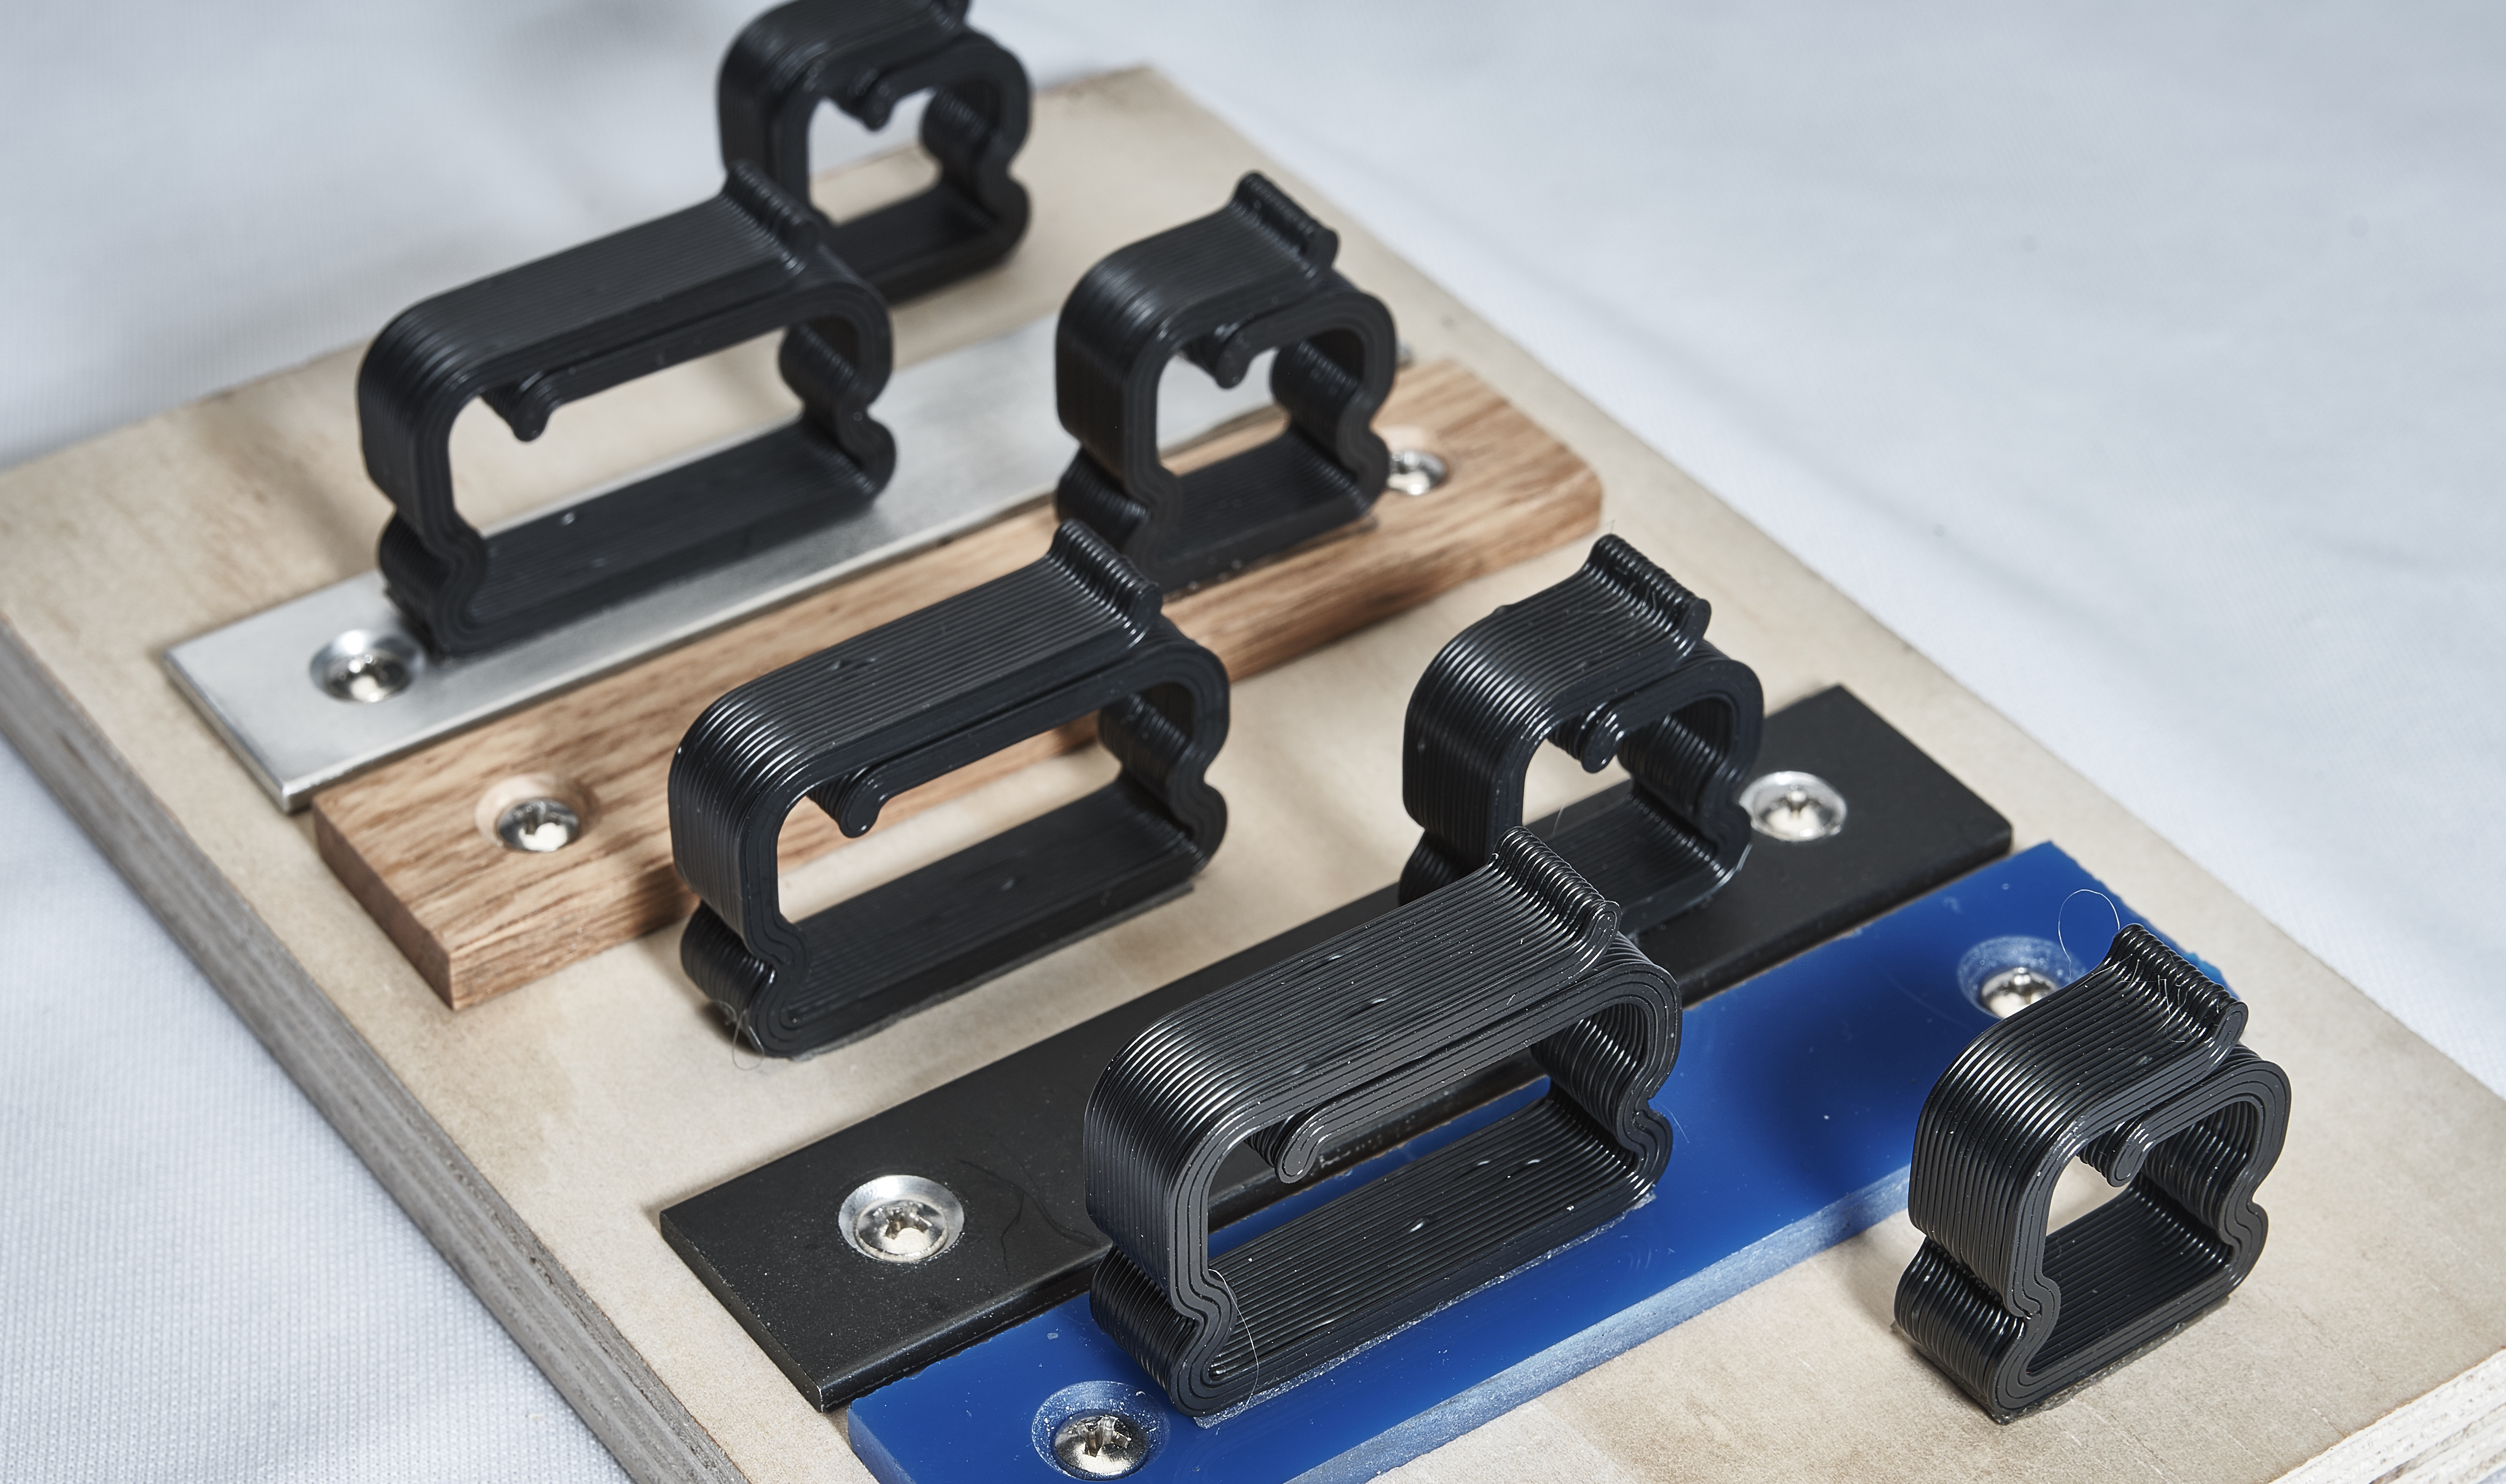
NOTE: If you’re going to get more tape, for reference, the parts are 12.2mm thick, or just under 1/2″. I use 1/2″ tape despite the overhang. The short clips use 1″, and the long clips 2″ of tape length. The parts best fit the small and medium Command Adhesive strips, which are quite convenient, but limited in strength.
For now, we chose to include some of those small- and medium-sized 3M™ Command Adhesive strips, one strip per clip, sized as appropriate. At this time there’s one extra medium-size strip in the package. Use them to mount the clips to painted and solid surfaces, plastic, metal, and laminate.
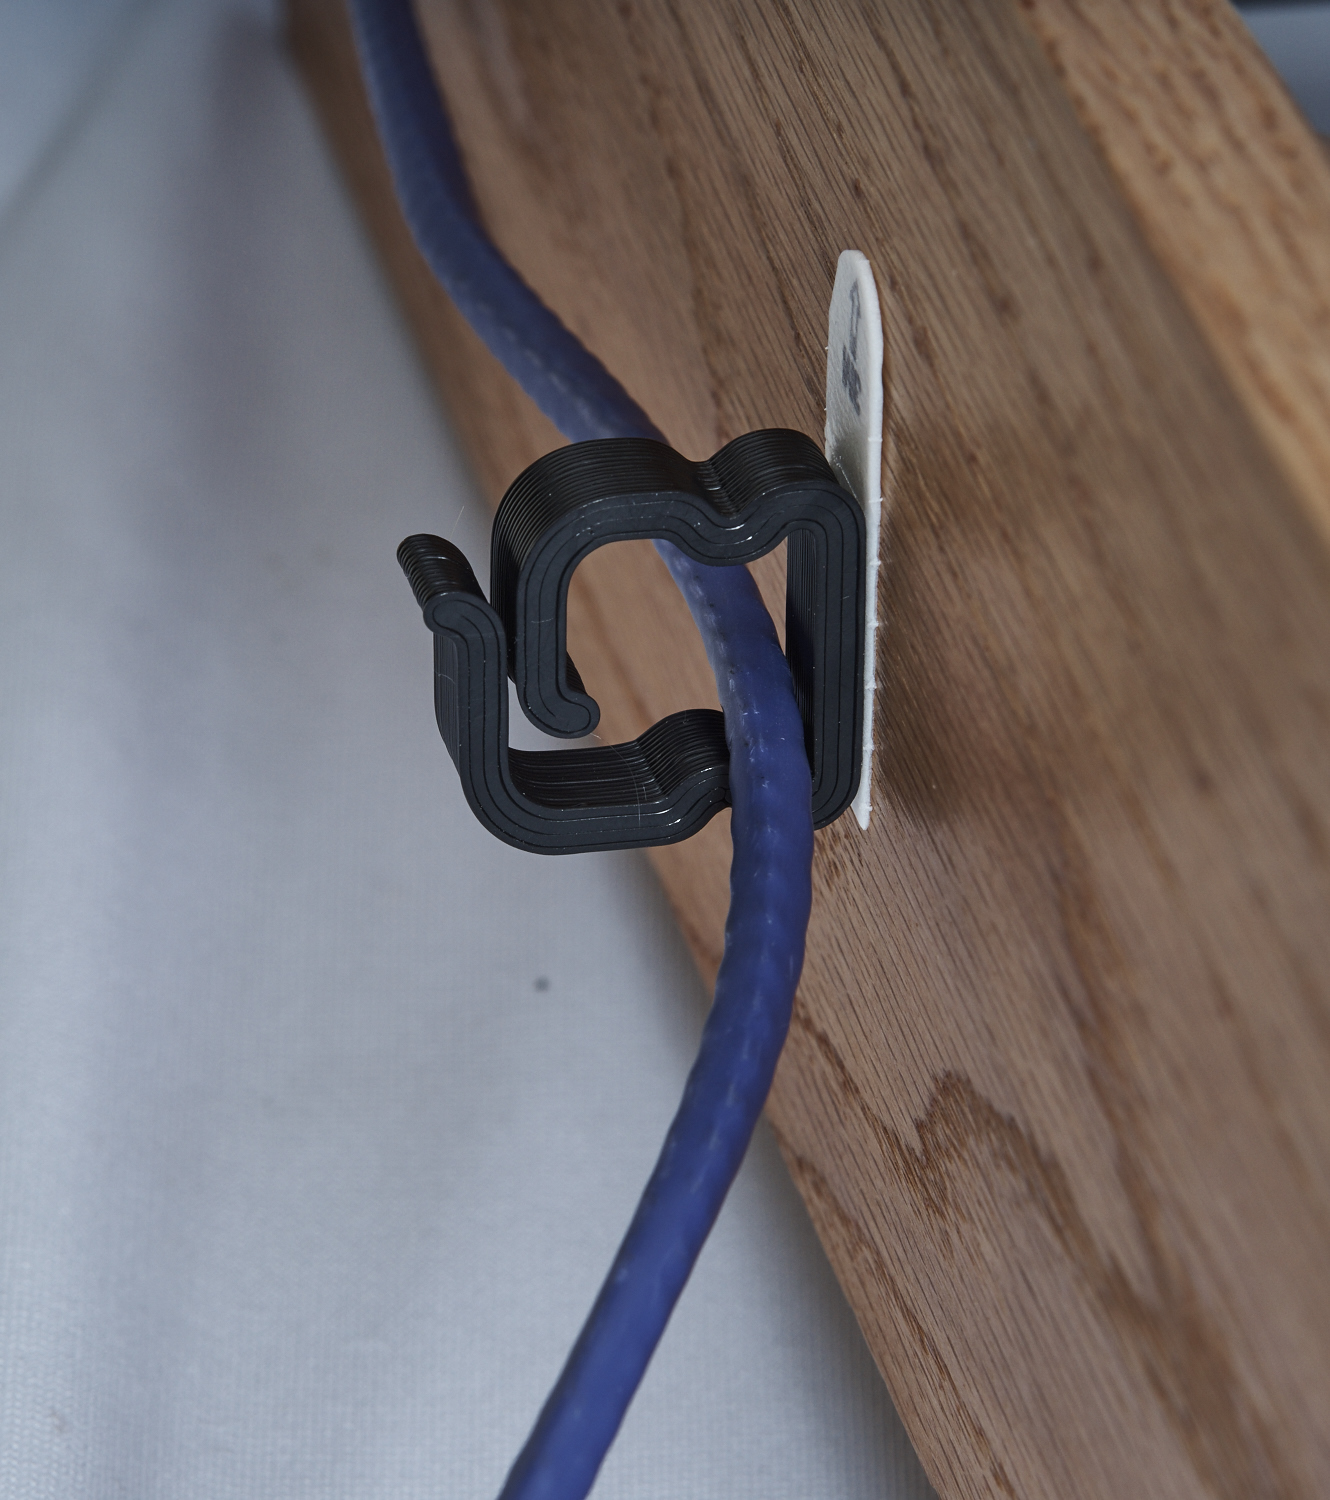
One thing to remember is that the Command stips probably will not work very well on unsealed wood surfaces. We’re working on a what to do in that perfectly-normal situation, so check the blog for updates. I’m a big fan of rubberized adhesives, but we’ll see.
The official instructions for this type of Command adhesive can be found at the 3M site:
https://www.command.com/3M/en_US/command/how-to-use/all-other-hooks/
If you’ve never used them, it’s important to realize that the Command strips are for “household use”, and
are only rated for a few pounds (~1 kg). OTOH, a power-cord typically weighs only about 5 ounces (140 gm). Total. So, be wary,
and substitute something stronger if your application needs it. The general steps are:
- Make sure the surfaces are free of dust and dirt.
- Remove grease and oils from the part and the surface by wiping them with rubbing (isopropyl) alcohol. Allow to dry.
- Peel the RED, part side from the Command Adhesive strip and attach that to the 4CELNK-YR clip.
- Smooth and continue to firmly press the Command Adhesive strip against the part for about 30s.
- Remove the black-printed backing paper from the Command Adhesive.
- Position the part carefully and press firmly against the surface.
- Continue to firmly press the part in place for 30-45 seconds. Take care to press across the entire length for the longer clips.
- Wait 1 hour before applying load; the bond will reach full adhesion strength in about 24 hours.
And yes, I’m PAINFULLY aware those two pieces of paper constitute WASTE. At least from that point there will none from moving wires in and out of the clips.
TIP: When you’re adding and removing cables, it’s a good idea to hold the clip in place so the force exerted only when adding the cable doesn’t become it’s undoing.
4CELNK-YR clips are re-usable, so when it’s time, gently pull the command strip off and reuse the clip.